Plugins 1
5 Best Free WordPress Reset Plugins to Clean Up Your Site
WordPress allows you to design and build your website according to your preferences. Nonetheless, there are situations where you might need to reset your WordPress site, essentially starting fresh. This can be particularly useful for testing environments, trying new themes, or checking plugin compatibility.
In such scenarios, resetting the database becomes necessary, and this is where WordPress reset plugins come into play. In this article, we will explore the top five free WordPress reset plugins.
Before delving into the plugins, let’s understand the importance of properly resetting your WordPress site.
When to Consider Resetting Your WordPress Site to Default Settings
Resetting your WordPress site can be a necessary step under various circumstances. Here’s a closer look at the primary reasons for considering a reset.
Practicing Website Development
If you’re learning WordPress or testing out new ideas, and you find that your site’s customization has gone off track or is causing performance issues, starting over could be more efficient than trying to reverse each change. This is also true for those building a site purely for practice.
Site Repurposing for Redesign
Whether it’s a major overhaul of your own website or a client’s project, resetting the site might be the way to go. This is particularly relevant when you’ve developed a new design on a staging site and are ready to make that live, thereby necessitating a clean start.
Recovery from Hacking
Should your site fall victim to hacking, resulting in unwanted code or spam within your files or content, resetting your WordPress site can provide a clean foundation to rebuild from, eliminating any remnants of the breach.
Starting over
When you lose sight of your project or wish to begin anew.
Removing demo content
During development, demo content is used to visualize the website before going live.
Client website revisions
Clients may request a site reset for various reasons.
WordPress experimentation
Resetting facilitates learning and experimentation with WordPress without reinstalling the core.
Situations When You Shouldn’t Reset Your WordPress Site
While there are clear scenarios where a reset is beneficial, there are also times when it might not be the best course of action. Let’s delve into these situations.
Partial Site Redesigns
If your goal is to update or change certain aspects of your site rather than a full overhaul, a reset might not be necessary. For instance, changing themes while wanting to preserve your content, plugins, and settings means a reset could do more harm than good. Instead, focus on optimizing what you have and consider other methods such as redirects and updating your sitemap.
Site Migration Needs
For significant changes beyond design, like moving to a new server, CMS, or domain, resetting isn’t the answer. These scenarios call for a migration strategy, which can be facilitated through plugins like Duplicator, allowing for cloning and transferring your site to its new environment efficiently.
Total Content Deletion
If you’re looking to completely remove your site from the web without plans for future use, deleting rather than resetting is advisable. This ensures that hackers cannot access an idle but live site. Deleting your WordPress files from the server and ending your hosting subscription is the way to go. For those wanting to start over on the same hosting account, delete the WordPress installation and proceed with a fresh install without canceling your hosting plan.
Understanding when to reset and when not to is crucial for managing your WordPress site effectively. With these insights, you’re better equipped to decide on resetting your site and how to approach it, including exploring plugin options for those opting for a reset.
WordPress Reset Free Plugins
Now that we grasp the reasons for resetting a WordPress site, let’s review the best free WordPress reset plugins available:
- WP Reset WP Reset is a popular WordPress reset plugin with over 200,000 active installations. It allows you to reset your site’s database quickly without affecting other files. This plugin is particularly beneficial for developers who frequently need to reset their sites for testing purposes.
- WP Database Reset With over 80,000 active installations, WP Database Reset is another widely-used plugin. It offers basic features to reset the database to default settings and supports the latest WordPress version.
- Advanced WordPress Reset This plugin saves time by resetting your WordPress database without requiring a fresh installation. It provides features like multisite support and the ability to instantly refresh your site.
- WordPress Reset A simple plugin targeted at theme and plugin developers, WordPress Reset enables you to delete content and customization easily.
- Customizer Reset This plugin focuses on resetting theme customizations made through WordPress Customizer. It is compatible with major themes and plugins using Customizer API.
In conclusion, having a reliable reset plugin is advantageous. Choose the one that suits your needs best and feel free to share your choice in the comments below. If you are interested, check out our guide on creating an email newsletter in WordPress.
BinancePay Checkout for WooCommerce : Accept Cryptocurrency Payments
BinancePay Checkout for WooCommerce is a plugin that allows you to accept cryptocurrency payments on your WooCommerce store. With this plugin, you can accept over 70 different cryptocurrencies, including Bitcoin, Ethereum, and Binance Coin.
To use BinancePay Checkout for WooCommerce, you will need to create a BinancePay merchant account. Once you have created an account, you can install the plugin and configure it to accept payments.
Once the plugin is configured, your customers will be able to pay for their purchases with cryptocurrency. They will be able to choose from a list of supported cryptocurrencies and pay with their preferred wallet.
BinancePay Checkout for WooCommerce is a secure and convenient way to accept cryptocurrency payments. It is also a great way to attract new customers who are interested in using cryptocurrency.
Benefits of using BinancePay Checkout for WooCommerce
There are many benefits to using BinancePay Checkout for WooCommerce, including:
- Security: BinancePay is a secure payment processor that uses industry-leading security measures to protect your customers’ data.
- Convenience: BinancePay Checkout for WooCommerce is easy to use and set up. Your customers can pay for their purchases with cryptocurrency in just a few clicks.
- A wider range of customers: By accepting cryptocurrency payments, you can attract a wider range of customers, including those who are interested in using cryptocurrency.
How to install BinancePay Checkout for WooCommerce
To install BinancePay Checkout for WooCommerce, follow these steps:
- Go to your WordPress dashboard.
- Click on “Plugins” > “Add New”.
- In the search bar, type “BinancePay Checkout for WooCommerce”.
- Click on the “Install Now” button.
- Once the plugin is installed, click on the “Activate” button.
- Go to “WooCommerce” > “Settings” > “Payments”.
- Scroll down to the “BinancePay” section and click on the “Configure” button.
- Enter your BinancePay merchant ID and secret key.
- Click on the “Save” button.
How to use BinancePay Checkout for WooCommerce
Once you have installed and configured BinancePay Checkout for WooCommerce, your customers will be able to pay for their purchases with cryptocurrency. To use BinancePay Checkout, your customers will need to:
- Add the items they want to purchase to their cart.
- Go to the checkout page.
- Select “BinancePay” as their payment method.
- Enter the amount they want to pay in cryptocurrency.
- Click on the “Pay” button.
Your customers will be redirected to the BinancePay website to complete the payment. Once the payment is complete, they will be returned to your store.
Conclusion
BinancePay Checkout for WooCommerce is a great way to accept cryptocurrency payments on your WooCommerce store. It is secure, convenient, and easy to use. If you are looking for a way to attract new customers and expand your business, then BinancePay Checkout for WooCommerce is a great option.
5 Best WordPress Plugins for Optimizing Your Website’s Images

Are you tired of slow-loading websites and frustrated visitors? Look no further than optimizing your website’s images! Images are an essential component of any website, but they can also be a significant contributor to slow loading times. However, with the right plugins, you can optimize your images without sacrificing quality, resulting in a faster and more enjoyable user experience for your visitors. In this blog post, we’ll be sharing the top five WordPress plugins that you can use to optimize your images and take your website’s performance to the next level. Whether you’re a blogger, business owner, or website developer, these plugins are a must-have for anyone looking to improve their website’s image optimization. So, let’s dive in and get started! 1. Smush
First up on our list is
1. ShortPixel
ShortPixel is an image optimization plugin that boasts an impressive compression rate of up to 90%. It also supports WebP conversion and lazy loading.
One unique feature of ShortPixel is its ability to optimize both JPEG and PNG files, which can be especially useful if your website has a lot of graphics or logos.
The plugin also offers a bulk compression feature, allowing you to optimize multiple images at once with just a few clicks.
2. EWWW Image Optimizer
EWWW Image Optimizer is another popular choice when it comes to image optimization plugins for WordPress. Like Smush, it promises to reduce image sizes without compromising quality.
In addition to optimizing your images, EWWW Image Optimizer also offers a number of other features such as lazy loading (which delays the loading of images until they are needed) and WebP conversion (which converts your images into a more efficient file format).
While not as user-friendly as some of the other plugins on this list, EWWW Image Optimizer is still a powerful tool that can help improve your website’s performance.
3. Smush
A plugin that promises to smush your images and reduce their size without losing quality. With over 1 million active installations, Smush has quickly become a favorite among WordPress users.
Once installed, Smush will automatically optimize all the images on your website. You can also customize the settings to exclude certain images or resize them to your desired dimensions.
One of the standout features of this plugin is its ability to compress even the largest of images, resulting in faster loading times without sacrificing quality.
4. Imagify
Imagify is another popular image optimization plugin for WordPress with over 200,000 active installations. It offers three levels of compression: normal, aggressive and ultra.
While the normal setting provides decent compression rates without sacrificing too much quality, the aggressive and ultra settings can result in more significant size reductions (up to 80%) but may affect the overall quality of your images.
Imagify also offers a bulk optimization feature and is compatible with popular page builders such as Elementor and Beaver Builder.
5. Optimole
Last but not least is Optimole – a plugin that takes a slightly different approach to image optimization. Instead of compressing your images, Optimole serves them from its own powerful CDN (Content Delivery Network). This means that your images are not only optimized but also delivered to visitors from the closest server, resulting in faster load times and better performance overall.
Optimole also offers a unique feature called adaptive images. This means that the plugin will automatically detect the screen resolution of the device accessing your site and serve an appropriately sized image to ensure the best possible viewing experience without sacrificing speed or quality.
Additionally, Optimole includes lazy loading functionality which loads images only when they are visible on the page, reducing unnecessary HTTP requests and further improving load times.
Optimole also offers a free plan with limited features, but for more advanced optimization and additional features, you can upgrade to one of their paid plans.
Conclusion
There are plenty of great image optimization options available for WordPress users. While each plugin offers different features and approaches to image optimization, they all share the common goal of improving website performance by reducing image size and load times. By choosing one of these plugins and properly optimizing your images, you can make sure your website is running as smoothly as possible for your visitors.
OpenAI and ChatGPT WordPress Plugins
OpenAI is a leader in natural language processing,
The rise of Artificial Intelligence (AI) has been an incredibly exciting development for the tech world. We’re now able to use machines to automate tasks, reduce labor costs, and develop intelligent applications that can revolutionize the way we do business and interact with the world around us. However, one of the most exciting aspects of AI is its ability to interact with humans in a natural way. Companies like OpenAI and ChatGPT are pioneering this interaction by developing innovative wordpress plugins that enable users to communicate with AI agents in a conversational setting.
WordPress contributors developed a plugin that allows users to easily integrate AI agents into their WordPress websites. This plugin provides an intuitive interface to interact with AI agents, such as OpenAI’s GPT-3 or their newest venture GPT-Neo. The plugin also offers powerful customization options to allow users to customize their AI agents for specific tasks or dialogues.
ChatGPT is another player in the AI chatbot market, providing an innovative plugin that enables users to embed an AI chatbot into their website. This plugin is perfect for businesses looking to reduce customer service costs and make it easier for visitors to get their questions answered quickly. The ChatGPT plugin allows users to customize the chatbot’s for their marketing funnels.
OpenAI and ChatGPT WordPress Plugins (paid)
- Your AI Assistant for WordPress – Easy Use OpenAI Services
- WordPress AI Writing Assistant / OpenAI GPT-3
- OpenAI Article Writer – GPT-3
OpenAI and ChatGPT WordPress Plugins (Free)
https://wordpress.org/plugins/gpt-3-ai-content-generator/
https://wordpress.org/plugins/ai-post-generator/
Create stunning websites with the Stackable WordPress Block Editor
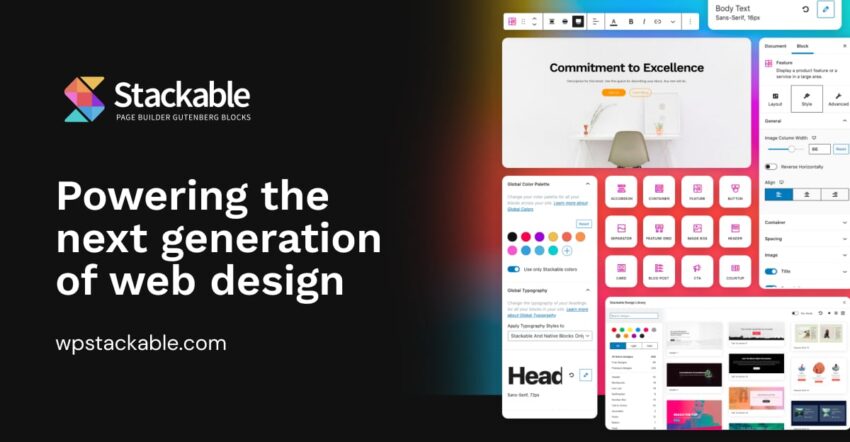
Stackable – Ultimate Gutenberg Blocks for WordPress is a powerful plugin that enhances the capabilities of the Gutenberg block editor in WordPress. With Stackable, you can easily create stunning and professional-looking pages and posts on your WordPress site.
One of the key features of Stackable is the wide range of custom blocks it offers. These blocks can be used to add various types of content to your pages and posts, including images, videos, buttons, testimonials, and more. Each block is fully customizable, allowing you to control the appearance and behavior of your content.
Alternative to Greenshift
In addition to the custom blocks, Stackable also includes a number of pre-designed templates that you can use to quickly create beautiful pages. These templates are fully responsive and can be easily modified to suit your specific needs.
Another great feature of Stackable is its support for custom CSS. This allows you to easily add custom styles to your blocks and templates, giving you even more control over the appearance of your content.
Overall, Stackable – Ultimate Gutenberg Blocks for WordPress is an essential tool for anyone looking to take their WordPress site to the next level. With its wide range of custom blocks and templates, it makes it easy to create professional-looking pages and posts with minimal effort.
WordPress Block Editor Stackable Lifetime Deal 👈
Blank Screen on WordPress Add/Edit Post or Page

Many of you may have experienced this issue after updating your WordPress version (specially after WordPress 5.6). The conflict caused by WordPress 5.6 updated Gutenberg editor with your excising theme’s visual editor. Keep in mind that this is not the issue called White Screen of Death (WSoD).
The WordPress 5.6 update was released in December 2020, and it’s been a hot topic for many WordPress users and developers alike. While the update comes with some exciting new features, there have been reports of issues that users are facing, including a “blank screen” upon logging into their WordPress dashboard.
This issue occurs when a user attempts to log in to their WordPress dashboard after updating to the latest version of WordPress 5.6. Instead of the normal dashboard page they’re used to seeing, they’re greeted with a blank white screen. This can be very frustrating, as it prevents them from accessing the settings and features they need to manage their WordPress website.
So what causes this issue? The primary cause is due to a compatibility issue between WordPress 5.6 and the Gutenberg editor. The Gutenberg editor is an integral part of the WordPress update and is used for creating and editing content on your website. Unfortunately, it appears that the new update is causing compatibility issues with certain plugins and themes, which leads to the blank screen issue.
Fortunately, there are steps you can take to resolve this issue and get your site back up and running again.
There are 2 suggestion to overcome this issue by the WordPress Community.
- Disable the Guttenberg editor by installing Disable Guttenberg plugin
- Or Install WordPress Classic Editor plugin

Most viewed