Tricks 5
Switching PHP Version within cPanel
Use following steps to switch your server/hosting package PHP version using cPanel.
1. Login to your hosting cPanel
2. Locate the MultiPHP Manager tool in the Software section of your cPanel.

3. Click the checkbox for the domain(s) that you want to adjust.
4. From the drop-down menu labeled PHP version, select the PHP version that best suits your site code.
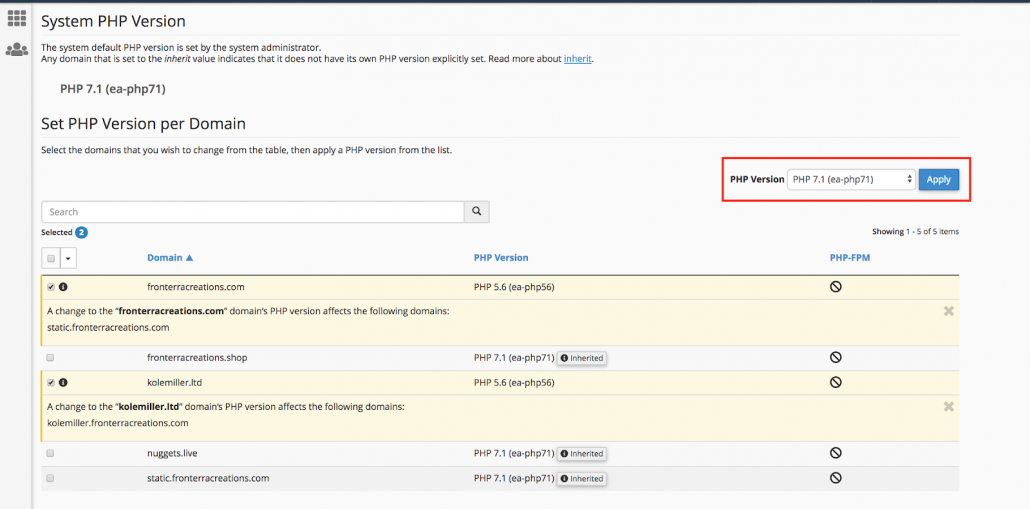
5. Click the blue Apply button to save the change.
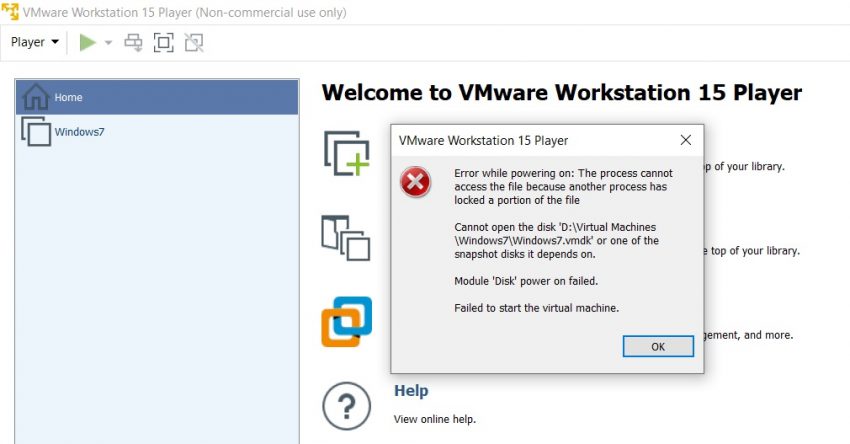
How to fix “Module ‘disk’ power on failed” VMware
Cannot open the disk ‘D\Virtual Machines\Windows7\Windows7.vmdk’ or one of the snapshot disks it depends on.
Module ‘Disk’ power on failed.
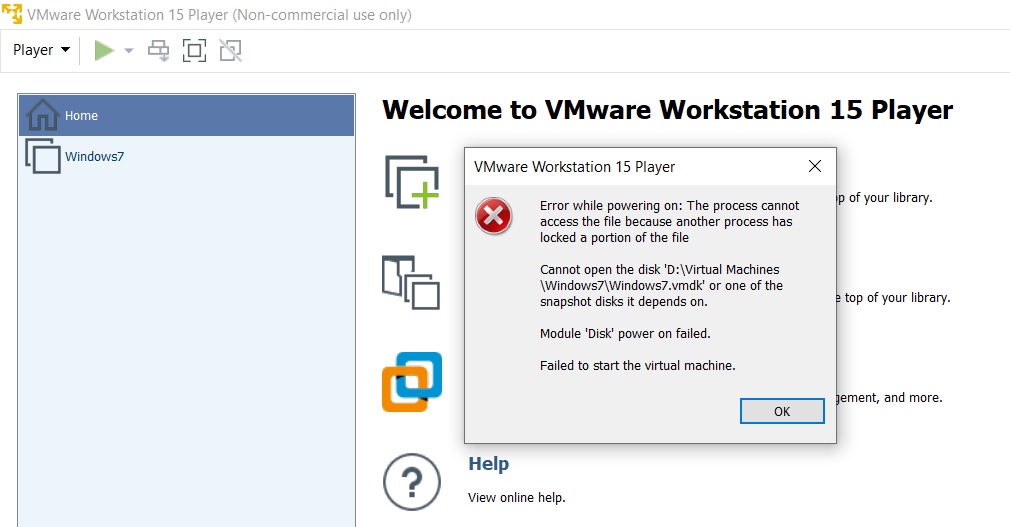
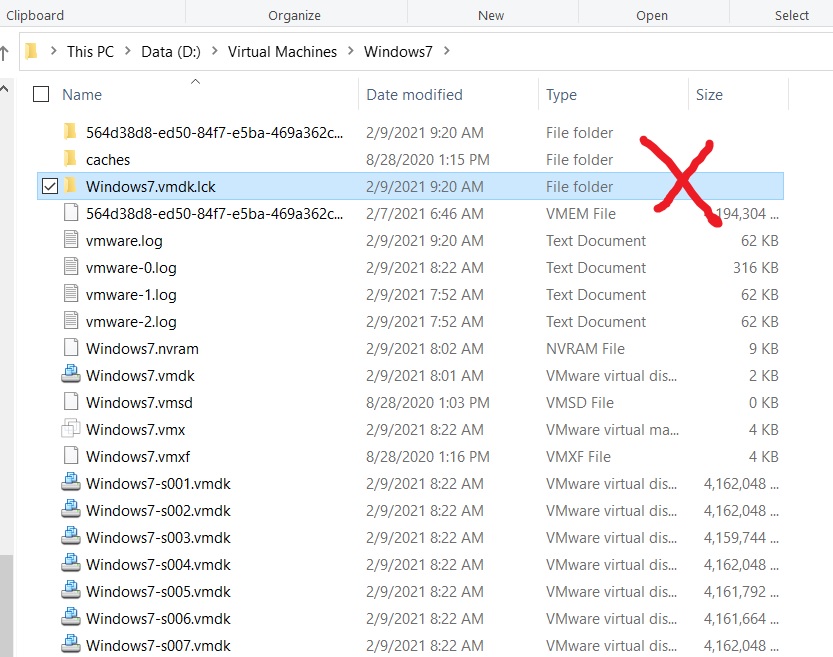
This might happen when VM not properly shutdown. All you have to do is to delete xxxxxxx.vmdk.lck (Windows7.vmdk.lck in above case) in the same folder.
Custom Fields for Gutenberg
Now you don’t need any plugin to display Custom Fields.
From WordPress version 5.0+ displays Custom Fields natively.
it requires only a couple of the following steps:
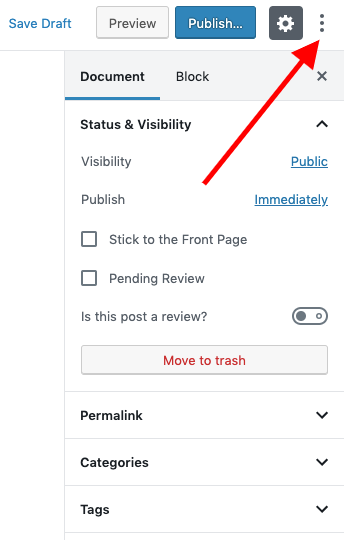
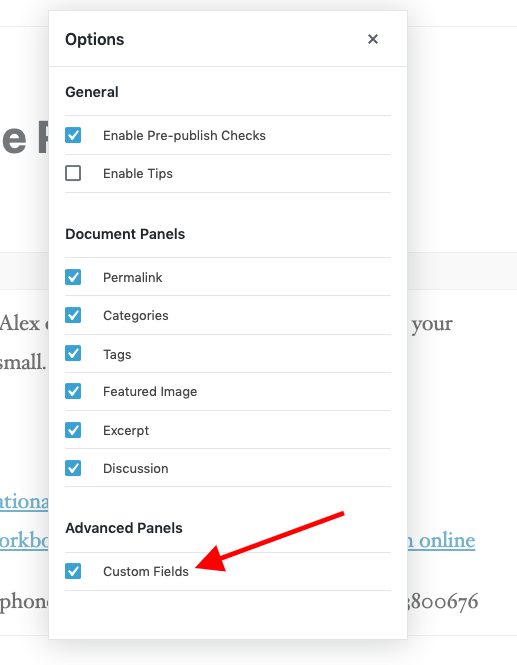
Just click the settings button (three dots) and go to Options, where you will find the option to display the Custom Fields meta box.
Jetpack Publicize for share your site’s custom posts on social media
By default, Jetpack’s Publicize is only triggered when you publish a new post. You can, however, extend this to other Custom Post Types. You have 2 options to add Publicize Support to a Custom Post Type:
- You can add Publicize support to an existing post type thanks to the
add_post_type_support()function. To do so, add the following code to a functionality plugin or directly modifying the theme’s functions.php file. (carefully)
add_action(‘init’, ‘my_custom_init’);
function my_custom_init() {
add_post_type_support( ‘product’, ‘publicize’ );
}
You’ll need to replace “product” with your Custom Post Type name.
2. You can add Publicize support when registering the post type:
// Register Custom Post Type
function custom_post_type() {

$labels = array(
‘name’ => _x( ‘Products’, ‘Post Type General Name’, ‘text_domain’ ),
);
$args = array(
‘label’ => __( ‘product’, ‘text_domain’ ),
‘supports’ => array( ‘title’, ‘editor’, ‘publicize’, ‘wpcom-markdown’ ),
);
register_post_type( ‘product’, $args );

}
// Hook into the ‘init’ action
add_action( ‘init’, ‘custom_post_type’, 0 );
cPanel doesn’t allow @ as the Name for TXT Record
When you try to edit TXT record in DNS Zone editor in cPanel, you might getting following error saying,
“You must specify a valid zone name.”

As a solution you can type the ‘domain name‘ instead of typing ‘@‘.

Most viewed


