How To 15
Root directory (htdocs) location – AWS LightSail (Bitnami & WordPress)

If you are new to Amazon AWS Lightsail, You might confused to find the default htdocs location of your website because it is bit deferent than other Linux systems.
So, How to find the root directory on Bitnami (WordPress) on Amazon LightSail?
Navigate using your FTP client as follows,
/opt/bitnami/apps/wordpress/htdocs/
or
/opt/bitnami/wordpress/wp-content
By default all user files are uploaded to /opt/bitnami/wordpress/wp-content
How to Change the Color of Your logo in Photoshop
- Watermarks are a great way to protect your work. They are also a great way to advertise your brand. you can place watermark can be placed on any type of image It can be customized to any color, size and font.
How to Change the Color of Your logo in Photoshop?
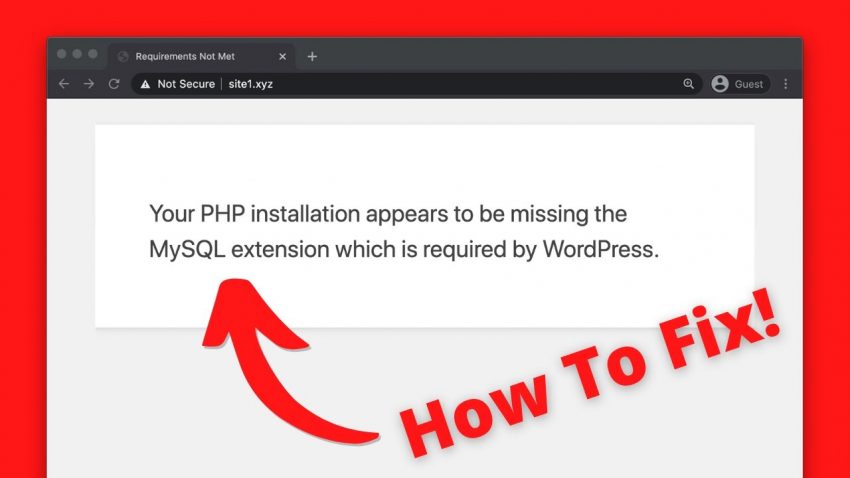
Fix “Your PHP installation appears to be missing the MySQL extension which is required by WordPress” Error
If you get this message without loading your WordPress site it means the PHP code in your site is not compatible with the version of PHP your site is currently using. More specifically, the issue is with the outdated MySQL extension which was removed as of PHP 7.0.
If you’re using any version of PHP above 7.0 and you’re seeing this error, it’s due to old code that needs to be updated.
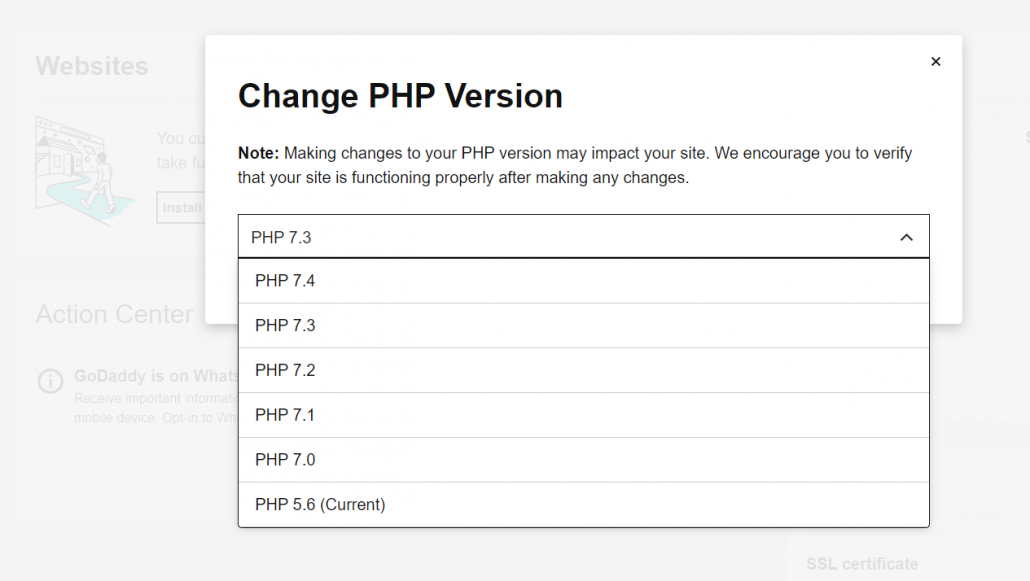
Solution 1 : If you unable to upgrade your WordPress installation to the latest for some reasons (i.e. – plugin compatibility) you have to downgrade the server PHP version. (v 5.6)
In order to do it please follow the instructions given by your hosting provider.
GoDaddy : https://in.godaddy.com/help/view-or-change-the-php-version-for-my-linux-hosting-16090
If you use cPanel, Read – Switching PHP Version within cPanel
Note: We are not recommending this as a permanent solution. Making changes to your PHP version may impact your site. We encourage you to verify that your site is functioning properly after making any changes.
Solution 2 : You will need to upgrade the core WordPress files to the current version, as well as any plugins your site is using.
Switching PHP Version within cPanel
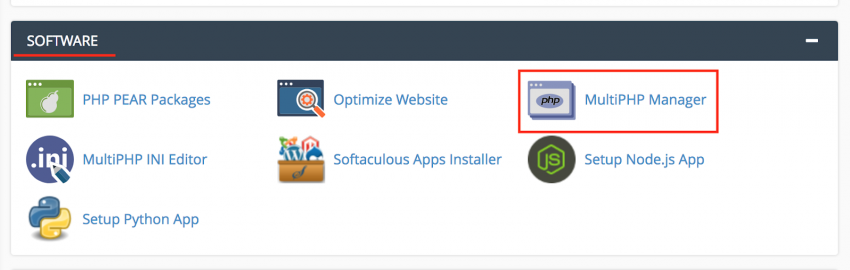
Use following steps to switch your server/hosting package PHP version using cPanel.
1. Login to your hosting cPanel
2. Locate the MultiPHP Manager tool in the Software section of your cPanel.

3. Click the checkbox for the domain(s) that you want to adjust.
4. From the drop-down menu labeled PHP version, select the PHP version that best suits your site code.
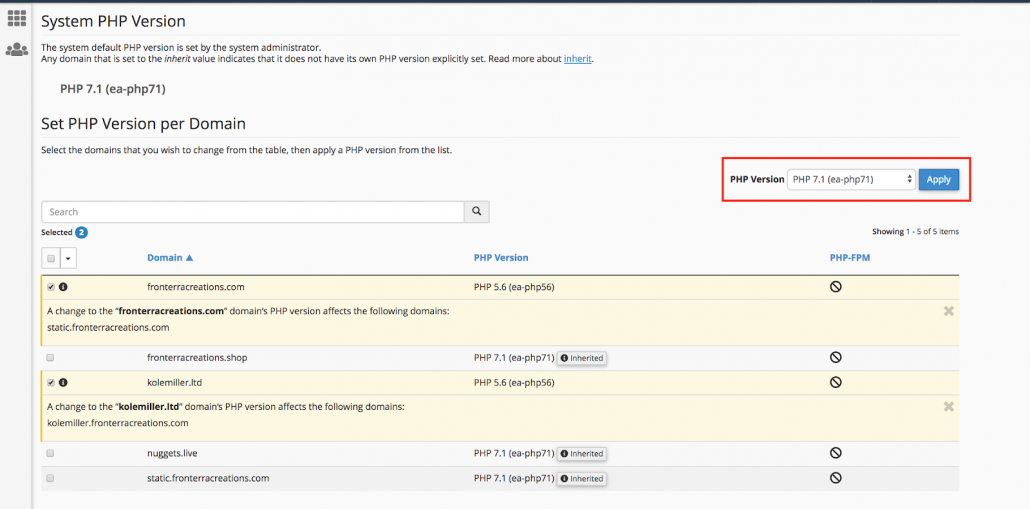
5. Click the blue Apply button to save the change.
Jetpack Publicize for share your site’s custom posts on social media
By default, Jetpack’s Publicize is only triggered when you publish a new post. You can, however, extend this to other Custom Post Types. You have 2 options to add Publicize Support to a Custom Post Type:
- You can add Publicize support to an existing post type thanks to the
add_post_type_support()function. To do so, add the following code to a functionality plugin or directly modifying the theme’s functions.php file. (carefully)
add_action(‘init’, ‘my_custom_init’);
function my_custom_init() {
add_post_type_support( ‘product’, ‘publicize’ );
}
You’ll need to replace “product” with your Custom Post Type name.
2. You can add Publicize support when registering the post type:
// Register Custom Post Type
function custom_post_type() {
$labels = array(
‘name’ => _x( ‘Products’, ‘Post Type General Name’, ‘text_domain’ ),
);
$args = array(
‘label’ => __( ‘product’, ‘text_domain’ ),
‘supports’ => array( ‘title’, ‘editor’, ‘publicize’, ‘wpcom-markdown’ ),
);
register_post_type( ‘product’, $args );
}
// Hook into the ‘init’ action
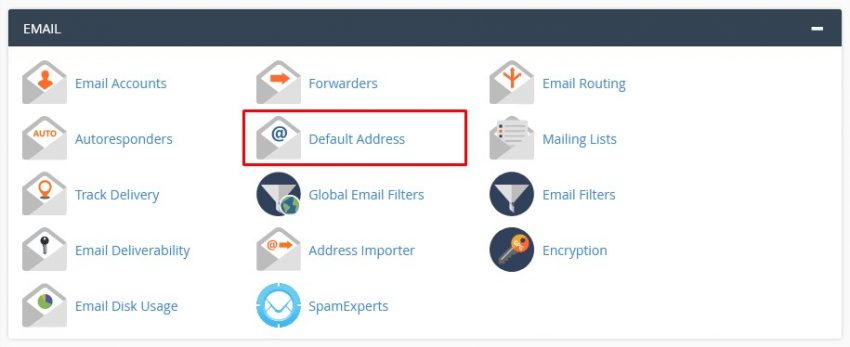
add_action( ‘init’, ‘custom_post_type’, 0 );How to “catch all emails” by setup “Default Address” in cPanel
The default or catch-all address is the one to which all e-mails, addressed to a non-available or mistakenly entered email account at your domain name are routed to. In case someone sends an email to [email protected] and you do not have such mailbox, the catch-all option will forward this email to your default email address.
By default your cPanel account will reject email sent to an address that you have not already setup with a mailbox or forwarder.
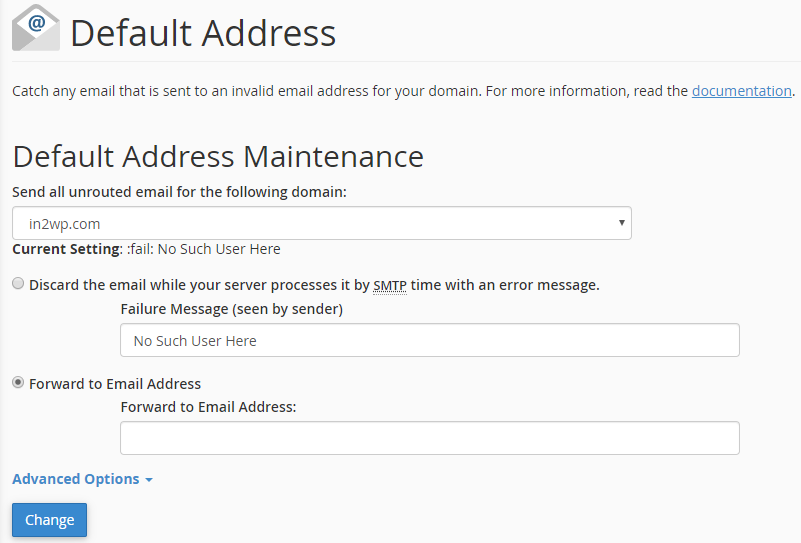
Under the Default Address Maintenance heading, select your domain from the drop-down list
(1) and the select the Forward to email address radio button
(2) Enter the address of your catch-all mailbox in the Forward to email address box
(3) Click the Change
(4) button to save your changes.
Warning:
While is is possible to send all such email to a catch-all address we strongly recommend against this practice as catch-all addresses are prime targets for spammers. Once your domain becomes known, spammers will target random usernames@yourdomain – it will be harder to filter spam, as your account will no longer reject email for unknown recipients.

Most viewed